Thursday, October 14, 2010

Spiced Pumpkin Waffles

In my search for something different and wonderful, I happened upon a link for this  recipe (original found at Chocolate on My Cranium).  What I have here is my version with a couple of changes and doubled (I like to make and freeze them)


Spiced Pumpkin Waffles 

* 1 1/2 cups all-purpose flour
* 1 1/2 cups whole wheat flour  (or I may use *all* whole wheat)
* 6 teaspoons baking powder
* 1 teaspoon baking soda
* 2 teaspoon cinnamon
* 2 teaspoon nutmeg
* 2 teaspoon ground ginger
* 1 pinch salt
* 4 eggs, separated
* 1/2 cup firmly packed brown sugar
* 1 14-16  oz. can pumpkin puree
* 3 1/3 cups milk (your preference.  I use coconut almond milk)
* 4 TBL olive oil

* Spray oil (such as Pam or the equivalent)
Directions
  1. Mix together flour, baking powder, baking soda, cinnamon, nutmeg, ginger, and salt in a medium bowl. 
  2. Separate eggs. Pour egg whites into a small bowl and whip until fluffy and white. 
  3. In a second larger bowl, add egg yolks, sugar, pumpkin, milk, and oil. Beat well. 
  4. Gently fold the flour mixture into the wet mixture and mix well 
  5. Gently fold in the beaten egg whites.
  6. Bake according to your waffle iron directions. These come out a nice golden brown. 
  7. Serve with maple syrup or honey butter.

Thursday, September 16, 2010

Lemon and Rosemary Chicken

I love the Thanksgiving holiday almost as much as I love the Christmas Holiday (which starts in August in my house).  The smells, the flavors, the gatherings, just linger in my heart.  One day, I was perusing a favorite recipe site for crock pot ideas, when I found this heavenly fragrant whole chicken dish.  It smells like Thanksgiving Day.

The original recipe claims a 9 hour cooking time, for a 3 lb chicken.  Mine, and always a bigger chicken, is done in about 6 hours. Work with your own slow cooker to see how long it takes in your home.  Flambo!!

Below is the link for the original recipe:

Fragrant Lemon Chicken

Here is what I do with it.  I put this in the Crock Pot every Sunday and it’s ready for us when we get home from church.

003 Ready to start cooking.

Lemon and Rosemary Chicken

1 whole chicken, 4-5 lbs
1 stalk celery, chopped
1 Apple, peeled, quartered and seeded

1 Lemon, zested and juiced
salt and pepper to taste
1 medium sized onion, (your choice) chopped
1 sprig of Fresh Rosemary (1 tsp of dried from a jar if you don’t have fresh)

1 cup water or Chicken Broth

Rinse the chicken and place in the slow cooker.  Stuff the cavity with the celery and apple pieces.

Sprinkle the Lemon Zest over the chicken breast, add salt and pepper.  Evenly distribute the chopped onion on top.  Squeeze the juice from the lemon over the onions, then pluck the fresh rosemary leaves off the stem and sprinkle them around the chicken.

Add the water or broth to the pot.

Place the lid on the pot and turn on to High for 1 hour.  After one hour, turn down to Low for another 5 hours (according to my crock pot) or until the chicken legs are easily moved around. 

This chicken can take 6-8 hours to cook, depending on your slow cooker quirks.  Mine takes about 6 hours.  But no matter how long it takes, it smells like Thanksgiving Day.  I love Sundays.

After the chicken is cooked, the juice makes a fabulous gravy. Strain the juices into a juice/fat separator, if you have it, leaving to sit for a few minutes so the fat can rise to the top.  Pour into a pot (after skimming the fat off the top if you don’t have the separator) adding the onions and rosemary to said pot along with more salt and pepper.  I add probably another cup of chicken broth from a carton (a good quality organic brand), about 1/2 cup Almond milk (regular milk will be just fine) a few pieces of  dark meat, shredded, and thicken with a cornstarch and water mixture. 

This is wonderful on Mashed potatoes, on the meat, and saving leftover gravy to pour into a Chicken Pot Pie on Tuesday.

Wednesday, September 8, 2010

Shazaam!

When I saw an ad for Spice Islands Saigon Cinnamosaigon cinnamonn, portraying it as something exotic and special, I was skeptical.  “Cinnamon is cinnamon,” I thought.  It was pricier than “regular” cinnamon, so I left it alone. Then one day, I was feeling adventurous, Flambo surged to the forefront as I perused the spice aisle, and a jar of Saigon Cinnamon flew into my cart. 

Shazaam! Flambo!  I am now a believer!  I have never tasted a cinnamon such as this.  Zing!  Red Hot Candies! Spicy love!  Be warned: If you are a Foodie, once you go Saigon, you don’t go back, and if you do, you are not satisfied. Worth the extra price.

Saigon Cinnamon from the  Spice Islands web site.  I have learned that cinnamon comes from tropical evergreen trees. Cool.

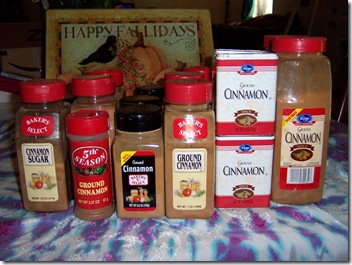
What am I going to do with my 20 jars of  Cinnamon storage?  Yawn my way through hard times?

stuff and christmas tree 032

Sunday, September 5, 2010

Food Storage for September

harvest moon


For some of us, the harvest is over.  Canned goods in glass jars, the fruits of our labors, line the shelves. For some, the harvest continues, with fall vegetables sill growing.  The anticipation lingers.

Our food storage item for September is Fruits and Vegetables.*

Fruits and Vegetables: 5 servings (1/2-1 cup)/person /day

OR

desired servings/ week x 52

Time to take an inventory of what you have, see what you need, and build on it.  Check Grocery sale fliers for great deals.  Store openings is a good place to find a “3 for a dollar sale.”  Keep and eye open for good deals throughout the year. 

If you are on the baby step program, go through your pantry, check for canned fruits and vegetables you didn’t use last month and throw them the closet with what you tossed in there last month.  Do you have $2.50? $3.00?  Add an extra 3 cans of fruits or vegetables (depending on what you want)  to your cart next time you shop, then throw it in the closet.  You’ve just added to your food storage!  If you’ve found you can do more, even better.

Using Dried Apples

Dried apples are an excellent snack straight out of it’s can or package. To reconstitute them use equal parts of dried apples to boiling water and let stand for 5 minutes. If you put this mixture through the blender you have Applesauce.

Stewed Apples and Raisins

In a saucepan, cover 1 cup dried apples and a few raisins with 4 cups boiling water and let stand for 5 minutes.

"President Marion G. Romney said, “We will see the day when we will live on what we produce.”  Producing our own food frees us from worries and more importantly, we pass on food preservation skills to the next generation. Canning, freezing and dehydrating skills are like any other.  The first time we try will be the most difficult, but the process will get easier as we gain experience.  If you haven’t canned or grown your own garden, consider starting to learn now, so you are prepared for the next season.   I highly recommend the “Ball Blue Book of Preserving, “ which can be found in garden centers, book stores, and the canning supply aisle in the grocery store.  (Amazon.com , itself, does not this version any longer)

)ball blue book

This book has recipes for how to can, dehydrate, freeze, recipes for canning salsa, jams, and even soups.

What Amazon carries now, is the newer version, titled,  “Ball Complete Book of Home Preserving

Ball complete book

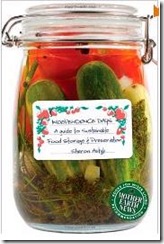
Another option is “Independence Days: A Guide to Sustainable Food Storage and Preservation.  canning bookOn this page, I also found a book about gardening on 1/4 acre and other interesting titles.


*It is suggested that we store seed.  You may find seeds still available at a Co-op, or farming store, to use for next season.  Also check local dollar stores, and other variety stores for seed packet sales.

Usable Lifetime of Common Seeds

Beans, 3 yrs                          
Eggplant, 4 yrs                             Pumpkin, 4 yrs

Beets, 3 yrs                          

Kale, 3 yrs                                   Radishes, 3 yrs

Cabbage, 4 yrs                      

Lettuce, 4 yrs                             Spinach, 3 yrs

Carrots, 1 yr                         

Melons, 4 yrs                               Squash, 4 yrs

Cauliflower, 4 yrs                 

Onions, 1 yr                               

Swiss chard, 4 yrs

Corn, sweet, 2 yrs                

Peas, 1 yr                                    Tomatoes, 3yrs

Cucumbers ,5 yrs                   Peppers, 2 yrs


Sunday, August 1, 2010

“But I Can’t Afford to Build a Food Storage.”

depression “Come, ye thankful people come; raise the song of harvest home.  All is safely gathered in, ere the winter storms begin.  God, our Maker, doeth provide for our wants to be supplied. Come to God’s own temple, come; raise the song of harvest  home.”  Hymns, no. 94

“But I can’t afford to build a food storage.”

Has anyone ever said that one?  I did, once. And I’ve heard it more than once. For some of us, building a food storage is incredibly intimidating.  Even the counsel from the 1st Presidency to focus on a 3-month supply can be too frightening for some to think about.  Time, financial issues, insecurity, fear, being overwhelmed already, prevent some from obeying this principle, or from having the faith to start.  The long lists and large amounts can be overwhelming. 

If this is you, would you consider something?  Do you have $2.50?  On your next shopping trip buy 3 cans of green beans (or any other vegetable your family will eat) then throw them in the bottom of your closet for now.  Look in your pantry or cabinets. What can you spare, or not use this week after all?  Throw it in the closet, too, checking the expiration date first.  Maybe you can buy a couple extra items next week.  Maybe not, but…. You have the start of a food storage. 

Wal Mart is selling a 5-pack of Kraft Macaroni and Cheese for that $2.50 (in central Arkansas, at least).  If your family eats this, can you buy an extra 5-pack and throw it in the back of the pantry?  You have the start of a food storage!!! (doing the snoopy dance).  

I know it is true the the Lord is there, whispering His encouragement and will bless you for every baby step you take. It is hard to be brave sometimes, I know, but listen for His whisperings. He’ll be there.

And remember, store only what you eat.

  • visit www.providentliving.org  for information on food storage and other interesting topics
  • see the “All Is Safely Gathered In” pamphlet provided by the church. Check with your Relief Society President for this.
  • About.com is a good place to look for food storage and emergency preparation.  Here is a page with links to help you on your way or just to explore for further information.
  • There is also a food storage calculator   at About.com to help you find out how much your family needs.
  • I googled,  “food storage list,” and this page of links came up for you to explore, if you wish.
  • If you’ve used one item,  can you put it on the list to buy 2 the next time you shop?  Can you be brave enough?  Have faith enough?
  • Check the dollar store for good deals.
  • A favorite food storage cook book I found, Cookin’ With Home Storage, by Peggy Layton, includes home remedies, syrups, household cleaners, survival foods, such as emergency baby formula, edible wildlife and when they are active.

According to some Relief Society materials I possess, we have a monthly food storage program to help us on our way.  We’re going to use this for now, here on this blog. 

August food storage item of month is Wheat, and other grains, such as rice, corn, oats, flour, whatever your family uses.  3oo lbs/person/year (if you are on the baby step program, buy an extra bag or two of some grain, be it rice, cornmeal, oatmeal and put it in the back of your freezer).  I would also consider pasta in this category.  Make sure you have a variety of grains.  I know someone who tried to live on only cornmeal and turned up malnourished.

Rice and ground flour develop grain bugs quickly in my climate, where the humidity is, like, 107 %, so consider this factor. You may need to freeze them.

Wheat is heavier than white flour and needs more leavening.

  • In yeast breads, use more yeast and or let it rise longer.
  • In baking powder leavened products, increase baking powder by 1 tsp for each 3 cups of whole wheat flour.
  • Recipes using baking soda do not need to be adjusted.
  • In baked products using eggs, separate the eggs and beat the whites until stiff.  Then fold in just before baking.  for extra lightness, an extra separated egg may be added.  Good for waffles and especially cakes.

It is wise to get your family accustomed to eating food storage items so they will not get sick if you suddenly find you have to depend on it. 

Breakfast cereal

1 cup of wheat makes 4-6 servings

Use either whole or cracked wheat with raisins, honey, cinnamon sugar, vanilla sugar or brown sugar. 

Thermos method

1 cup whole wheat
2 cups boiling water
1/2 tsp salt

Place on a quart sized thermos; screw top lightly.  Leave overnight.  Serve with milk, if you like, and garnish as you wish.

Gas Range method-using pilot light

1 cup whole wheat
2 cups boiling water
1/2 tsp salt

Place ingredients in a pan over the pilot light all night.

Crock Pot Method

1 cup whole wheat
2 1/2 cups water
1/2 tsp salt

Cook 6-8 hours or overnight on low

Cornbread waffles

2 cups pancake mix
1/2 cup cornmeal
1 Tbl Sugar
1/4  cup oil
1 -7-oz can corn, drained
1- 1/2 Cups milk
2 eggs, separated

Chili beans and cheese (opt)

In a small bowl, beat egg whites until stiff peaks form.  Set aside.

In a large bowl, combine pancake mix, sugar and cornmeal.  Set aside.

In a medium sized bowl, beat egg yolks.  Add oil, milk, and drained corn.  Add to wet ingredients, stirring to mix. Gently fold in the egg whites.  Bake on waffle iron according to general directions, until crisp.  Serve plain or with chili and cheese.

cheese. cook on waffle iron until crisp.  Serve with heated chili and top with grated cheese.

The general program list is:

January-Salt and leavenings 5 lbs/person/year

February-Beans  60 lbs/person/year

March—Rice and other grains (also see august)  part of your 300 lbs/person/year

April—Oil and Shortenings   20 lbs/person/year 
72-hour emergency kit expiration date check and rotation—done  General Conference weekends

May- Paper products and garden needs

June—Milk or milk substitutes  75 lbs or 300 quarts/person/year

July—Sugar and honey  60 lbs/person/year

August--Wheat and grains—300 lbs/person/year

September—Fruits and vegetables  5 servings/person/day or desired servings/week x 52

October—Fuel and light, Alternate energy cooking, candles, flashlights, clothing and warmth, 

72-hour emergency kit expiration date check and rotation—done General Conference weekends

November—water and filter accessories

December—soap, personal hygiene items and inventory storage

This listing does not include meats and poultry, I know, but we can survive on a vegetarian diet.  Watch for meat sales and add as you are able.

Friday, July 30, 2010

Chocolate Coca-Cola Cake

I have been searching for a chocolate cake that left me with the desire to make it again, and I have finally found it. 
I came across this Chocolate Coca-Cola cake in a novel I was reading and gave it a try.  I made my own alterations, of course.
The recipe called for 1-1/2 cups of miniature marshmallows, but since I didn’t have minis, I just threw a bunch of big ones in the pot.  I also had to substitute the buttermilk for 1/2 cup almond milk with 1/2 Tbl lemon juice (vinegar will also do) in it-let sit for 5 minutes.  Also the frosting gets poured over the cake while it is still hot. I poured it while it was merely warm and the frosting settles like a fudge. I did pour the frosting while the cake was still hot once --t
he frosting crystalized on the bottom of the pan under the cake and the frosting slid off the top of the cake.  I didn't like, but the next person will. To each his own. Flambo!

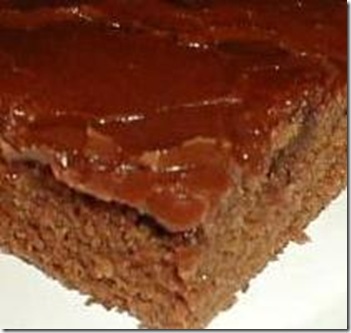
chocolate coca-cola cake
If you are looking for low fat-low calorie, this is not it.

Chocolate Coca-Cola Cake
2 cups all purpose flour
2 cups sugar

1 tsp baking soda
2 tsp baking powder
1/2 tsp salt


1 cup Coca-Cola (I use caffeine free as a personal preference)
1/2 cup Canola oil (Extra light olive oil is great, also)
3 Tbl cocoa powder (Hershey dark cocoa powder is great, also)

2 cups mini-marshmallows

1/2 cup buttermilk

1/2 cup applesauce
2 eggs
1 tsp vanilla


Icing
3 Tbl cocoa powder (Hershey dark cocoa powder is great, also)
1/2 cup margarine
6  Tbl Coca-Cola
1-1/2 lb powdered sugar 
1 tsp vanilla


In a mixing bowl, combine flour, sugar, baking soda, baking powder and salt. Set aside. 

In a medium sized saucepan, combine coca-cola, oil (2 sticks of margarine may be substituted) cocoa powder and marshmallows.  Heat and stir until marshmallows are melted and mixture is well combined. Let cool a few minutes then add to the flour mixture.  

Add buttermilk, eggs, applesauce and vanilla, beat for 2 minutes.  Pour into a greased 13 x 9 pan.  Bake at 350 degrees for 30-40 minutes.

For frosting:  combine cocoa powder, margarine and coca cola in a saucepan. Heat, stirring frequently until margarine is melted.  Mix with powdered sugar until it makes a thin paste (pourable, I went for a little thicker).  Add vanilla.  The original directions say to drizzle over the cake while it’s still hot from the oven. I pour when the cake is cooler/warm.  I prefer that frosting consistency.
Let cool. Serve and enjoy a square of wonderfulness.  This went fast in our household.

Wednesday, July 14, 2010

Southwest Chicken Brown Rice

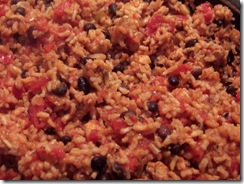
sw c hicken fried rice 008 This is an old favorite that I found on the back of a box of Instant Brown Rice.  I have since lost the recipe, but since we know our way around the kitchen and can read labels, I make do.  Flambo!!

In this recipe, I prefer to use Diced Tomatoes.   Substituting a can of Rotel for one of the cans of tomatoes would be great, but I didn’t have one today.  This recipe serves more than my family of 5, which includes 1 insatiable teenage son.

Southwest Chicken Brown Rice

3 Boneless Chicken Breasts, cut into small pieces
1 tsp Chili powder
1/2 tsp Ground Cumin
1/2 tsp Garlic powder
1/2 tsp Salt
1/4 tsp ground Pepper
1 large Onion, chopped 

2 15-oz-ish cans tomatoes,drained,
reserving juice~ you need it 
1 1/2 cups water
1 1/2 cups Salsa (your favorite)
2 tsp chili powder
1 tsp ground cumin
salt and pepper to taste

4 cups Instant Brown Rice

1 can Black Beans, drained and rinsed 
1 cup grated Colby Jack cheese (opt)

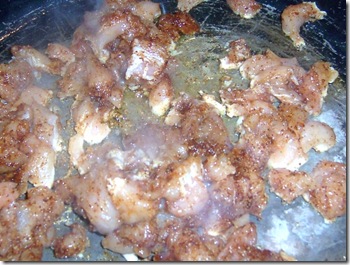
Cut chicken breasts into small pieces and place them in a small bowl. Add the chili powder, cumin, garlic, salt and pepper.  Mix well and allow to marinade for a few minutes

In a large skillet pour about 1/4 cup oil and turn on the heat.  When it’s hot, add the marinated chicken and cook for a few minutes.

sw c hicken fried rice 001

Stir to keep from burning and sticking, turning down the heat as necessary. Add the onion and continue cooking until tender and chicken pieces are no longer pink inside.

Meanwhile, drain the tomato juice into a bowl, squeezing the juice out of the tomatoes, also, to get 2 cups (add water to measuring cup if necessary). Set juice aside. Reserve the squeezed tomatoes in a bowl and we’ll get back to those later.  Drain and rinse the black beans.

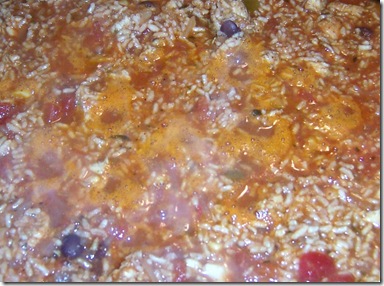
When the chicken and onions are done, add the tomato juice, water and salsa.  Bring to a boil and the rice. Return to a boil, cover and simmer for 5 minutes.

sw c hicken fried rice 002

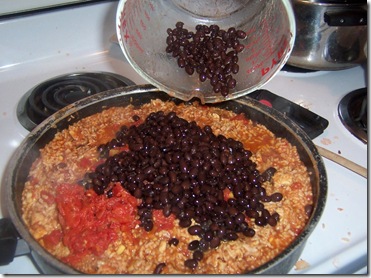
Remove from heat. Add the reserved tomatoes and black beans.

sw c hicken fried rice 003

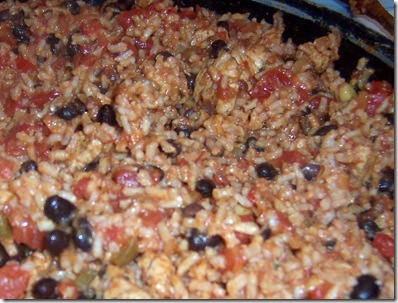
Mix well. Top with cheese (opt).  Cover and let sit for 5 minutes.

sw c hicken fried rice 004
Serve and enjoy! 

Friday, July 9, 2010

Corn Muffins

Oh what does one do with Vanilla sugar? Add it to Corn Muffins!  Oh, this changed everything.  Flambo!!

white corn muffins 002


Corn Muffins

2 eggs
1/4 cup Vanilla Sugar
1/2 cup extra light Olive Oil
1 cup milk (I used almond milk)
1/3 cup corn niblets (I cut off from left over corn on the cob)

2 cups Muffin Mix (see side bar)
3/4 cup cornmeal (color of your choice)

In a large mixing bowl, combine the eggs, sugar, oil, milk and corn niblets.  Mix well.  Add the muffin mix and cornmeal and stir till just mixed.  

Using a 12-muffin pan, pour about 1/3 cup into each cup. Bake at 400 degrees for 16-20 minutes, depending on how your oven bakes, or until lightly golden brown.  Cool on wire rack and enjoy.

Monday, July 5, 2010

Blueberry Bagels

Wow. This was amazing. I made these because a friend wants me to teach her to make bagels. She wanted to make Blueberry ones. Well, I’ve never made fruity bagels so I figured I’d best try it out first. Not being a big fan of fruity bagels, I made them with an attitude of just testing it out, planning to have my Flambinas eat them. But, these were amazing.  Have I mentioned that?  The texture is different from a store bought, packaged bagel, and I think that made all the difference in the world.  I also used my Vanilla Sugar in the recipe.  Mmmmmmm.  We will make this again. Flambo!

hats and bagels 014

 my directions will be for using a Kitchen Aid mixer. 

Blueberry Bagels

6 1/2-7 1/2 cups unbleached flour
i pkg yeast (or 2 1/4 tsp from the jar)
2 Tbl Vanilla Sugar ( plain sugar will do)
1 tsp salt
2 1/4 cups warm water
1 Tbl extra light Olive oil
4 oz package dried blueberries

2 Tbl Vanilla Sugar (for later use in boiling stage)
2 greased baking sheets

In a small bowl, proof the yeast with 1 tsp regular sugar and 1/4 cup warm water.

Meanwhile, combine 5 cups flour, Vanilla Sugar and salt in a mixing bowl.  When yeast mixture has bubbled up, add to the mixing bowl along with the remaining 2 cups of water and olive oil. Add blueberries. Add more flour as needed, using a spatula to scrape sides of bowl, to make a dough that is smooth, elastic, and not sticky.  The blueberries should be well combined with the dough.

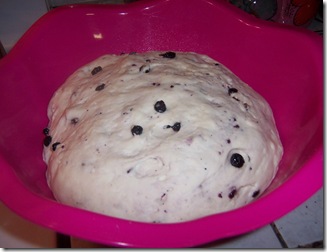
Remove from mixing bowl, and place in an oiled bowl. Cover and let rise for about 1 hour.
hats and bagels 003

Punch down. Cut into 16 pieces.  Roll each piece into a ball until smoothed.
hats and bagels 005
(this ones needs a little more rolling)

Poke a hole in the center of the ball of dough.
hats and bagels 007 
Place on greased baking sheet (I prefer baking stones~still grease them-I use a spray) 
hats and bagels 008 

Cover and let rise for about 20 minutes. They will get puffy.
hats and bagels 009 

After 10 minutes of the rising time have passed, start a large pot of water and 2 TBL Vanilla Sugar to boil (will probably take about 10 minutes to boil)

hats and bagels 011
 
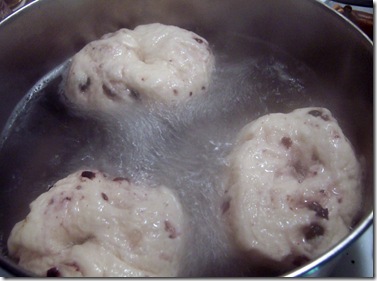
Poach bagels, about 3-4 at a time, for about a minute.  I drop them top down and then turn them over immediately so the bottom can set. Then I turn them top down again for about  30 seconds. Turn and boil bottom down about another 30 seconds. This sets the rising so they will not rise any more while baking.

squash and bagels 007

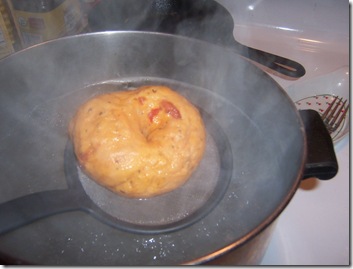
Remove them from the boiling water (I use a skimmer~it’s like a big spoon with a screen for the dipper. The above foto is of a sundried tomato bagel. You’ll find the link for these in the archives for June 2010 ) and return to greased baking sheet. 

hats and bagels 012 
Bake at 375 degrees for about 30-35 minutes, until lightly golden brown.  Cool on wire rack

Saturday, July 3, 2010

Fudge (no dairy)

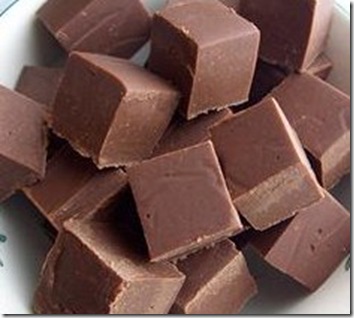
We have milk allergies in our household, and are fudge lovers, so we modified recipes to come up with what works for us

fudge

Fudge

2 sticks margarine w/o milk (blue bonnet light is all we can get in our area)
1 13.5 oz can coconut milk (found in oriental food section in our grocery stores)
1 Tbl good quality extra virgin olive oil (to make up for "light" margarines)
4 cups sugar

Place margarine, milk, oil and sugar in a heavy pot, combine well, and bring to a boil. Reduce heat to medium low and simmer to soft ball stage, stirring frequently. I do not recall the temperature on a candy thermometer, but I start to test it when the mixture starts to thicken up a little and turns a golden color. In a small bowl of cold water, drop a couple spoonfuls of mixture , then shape it into a ball. If it holds, it's ready. I prefer to catch it early, just as a ball can form, so the fudge will be creamier and smoother.

Remove from heat. Add:
1 16-oz. carton of marshmallow creme
1 bag of semi-sweet Ghiradelli chocolate chips
1 tsp vanilla (or 1/2 tsp butter and nut flavoring)

Mix well and pour into a lightly greased (sprayed with Pam) oblong pan. Refrigerate till set. Enjoy!!

Monday, June 28, 2010

Vanilla Sugar

There are so many interesting things out there to try. I love to check out a new cookbook and see what I’ve never heard about, or made before-- or get an idea, change it around and make something completely new.  In my travels, I read  about Vanilla Sugar and decided to give it a try.  Some people use it as a table sugar to sprinkle on cereal, herbal teas, warm milk, puddings…whatever. It was suggested to use it in baked goods, but, I don’t know…Vanilla Beans are very pricey…..  What shall I do with it? Oh, what shall I do?  Maybe….in…my Cinnamon Swirl Rolls…….Flambo!!  We’ll find out in a week or so.  Maybe I’ll just open the jar and smell it. 

008

Vanilla Sugar

Fill your loveliest quart-sized canning jar with white sugar (about 3 -3/4 cups). Snip 2 Vanilla Beans into thirds and arrange them as you desire with the sugar.  I distributed them at various levels. Place the lid on top and after a week, your sugar will have the scent infused throughout.  I’ll report back in a week.

According to “How to Be a Domestic Goddess,” by Nigella Lawson, you can substitute cinnamon sticks, unsprayed rose petals, or dried tangerine peel (which you can find in an Asian Grocery).  She also speaks of Rosemary Sugar (a few sprigs of fresh Rosemary in the jar),  which can be sparingly used to sweeten meat or Tomato sauces.  You can also sprinkle it on the top of Rosemary cake….hmmmm..I think I’ll try that one too….Rosemary Cake is also intriguing. Time to get my Flambo on!!! 

Thursday, June 24, 2010

White Chip Ginger Cookies

Oh, Honey Me! Were these ever wonderful. Someone baked these in a novel I recently finished reading, and I just needed to give this a try.   (I think it was a Sarah Addison Allen book.) I looked up a recipe for Ginger cookies in my Pink and White checkered cookbook and Flambo! Here we have something I will make again.
The original recipe calls for making really BIG cookies. I made them smaller, so it makes a BIG batch of cookies. Get your Flambo on and make what suits you.
 white chip ginger cookies 002
White Chip Ginger Cookies
4 1/2 cups all purpose flour
4 tsp ground ginger
2 tsp baking soda
1 1/2 tsp ground cinnamon
1 tsp ground cloves
1/4 tsp salt
1 1/2 cups shortening
2 cup sugar
1/2 cup molasses
1 bag white chips

1/2 cup sugar In a large mixing bowl beat shortening for about 30 seconds.  Add sugar and beat until combined. Add eggs and molasses. Mix well, scraping the sides of the bowl with your favorite pink spatula.

Add flour, ginger, baking soda, cinnamon,cloves and salt, mixing until well combined. 

Add white chips and mix until evenly distributed throughout the cookie dough.
Roll into 1 inch-ish balls, roll in the remaining sugar and place 1 1/2 inches apart on ungreased cookie sheet. **

Bake at 350 degrees for 8-9 minutes or until bottoms are lightly browned and tops are puffed.  Cool on cookie sheet for 2 minutes then transfer to cooling racks.
** For BIG cookies, roll into 2-inch balls using a 1/4 cup measure.  Roll balls in the sugar.  Place 2 1/2 inches apart on ungreased cookie sheet.  Bake at 350 degrees for 11-13 minutes or until bottoms are lightly browned and tops are puffed.  cool on cookie sheet for 2 minutes then transfer to wire racks to cool.

Tuesday, June 22, 2010

Sun Dried Tomato Bagels

Finally, the moment you all have breathlessly been waiting for….I think I have it.  I found a recipe online for Sun Dried Tomato bagels and used this as my base, but the ingredient amounts left me with flat, wrinkly bagels but incredibly flavorful.

Boiling time is negotiable.  I usually boil a  couple of minutes on each side. Other bagel recipes have you boiling for 7 minutes on each side.  I don’t want to do that.

Sundried Tomatoes can be hard to find.  I found them packed in oil at Wal-Mart (they are next to the mushrooms in the canned tomato aisle) and they are usually out of them.  I found bagged Sun dried tomatoes at Kroger.

My family loves these,with my insatiable son eating 4 in a day sometimes. My directions will be with a Kitchen Aid Mixer so modify as needed…. So, without further ado…Flambo!!

easter cake and bagels 010

Sun Dried Tomato Bagels
(makes 16 bagels)
oven 375 degrees

7-8 cups unbleached flour
4 tsp yeast
1 Tbl sugar
1/4-ish cup warm water

3 tsp dried basil
2 tsp California-style Garlic Powder
2 tsp Sea salt
2 TBL sugar
2 cups vegetable juice (I use V-8)
2/3 cup snipped sun-dried tomatoes


Proof the yeast in a small bowl, with 1 Tbl sugar and 1/4 cup-ish water. 

Place 6 cups of the flour into the mixing bowl.  Add basil, garlic powder, salt and sugar.  Heat the vegetable juice to lukewarm temperature (I nuke it).  Add proofed yeast and vegetable juice. Turn on the mixer and let it knead, adding another cup of flour after a couple minutes.

Meanwhile, I snip my tomatoes during the kneading process and add when I have enough.  This will make the dough more wet, so you will need to add about 1/2 cup more flour.  Continue kneading and adding flour until the dough is smooth.  You don’t want a wet dough, as bagels will not be strong enough to hold their shape after boiling..

Remove dough from bowl and allow to rest for 15 minutes.

Grease 2 baking pans.  (even if they are baking stones)

squash and bagels 004

Cut dough into 16 sections.  Shape each piece into a smooth ball, then poke your finger through the middle to made a hole.  If you like, swirl it around your finger a couple of times to make the hole bigger. Place on greased pans and allow to rise for 30 minutes. After the first 20 minutes, start a large pot of water to boil so it will be ready by the end of the 30 minutes.  I have learned no not allow them to rise much longer than that 30 minutes.

 squash and bagels 006
Drop 3-4 bagels into the boiling water, top down, then flip after a few seconds to get the bottom started.  After a few more seconds flip again, to top-side down again and allow to boil about 2 minutes (more or less) Flip the bagel top side up and allow to boil a couple of more minutes.   I have learned that boiling completes the rising process and they will not rise any more than this. It took me two tries to keep my bagels from falling, needing more flour—a stiffer dough.  Then a couple more times to keep them from being horribly wrinkled—rising too long. (They will be a little wrinkly from boiling—we’re just trying to keep them from falling flat)

squash and bagels 007 
With a slotted spoon or skimmer, remove bagels from water, allowing to drain.  Return to greased pan and add the next batch of bagels to the water.
squash and bagels 005

Bake at 375 degrees for about 35 minutes, checking for a nice slightly browned red-orange-y color.  Remove bagels from pans and cool on wire racks.  Best when eaten warm. The texture will be chewy. Freeze them the day you bake them and defrost as desired.

easter cake and bagels 010
 
Serve as they are, warmed, or as a pizza bagel, as a sandwich, or sliced open with melted mozzarella cheese on top. Be creative!  Flambo!!

Friday, June 18, 2010

Shepherd’s Pie

When I was in my teens, my, then, Steply-Ugmother made this horrible concoction called Shepherd’s Pie.  I swore I would never eat such a toxic waste muck ever again. =:0~~~~@
Luckily, we can repent of our swearings.  I attribute this recipe to a family I go to church with.  I have not yet sought their permission to mention their names here, so I’ll leave it at that for now.  Their family brought this dish to us in the week after my husband died.

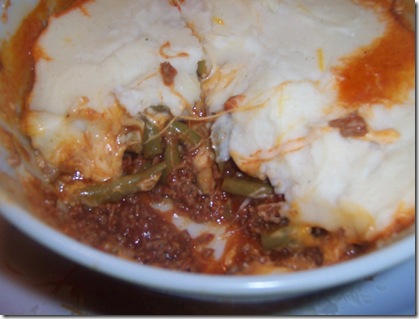
The difference is ~*Taco Meat*~ instead of Toxic Meat.

shepherd's pie and tomatillo 001

In the following recipe, you may substitute a Taco Seasoning packet in place of the tomato sauce, Rotel and spices in the taco meat.

Oven temp is 400

13X9 inch baking dish

Shepherd’s Pie

2 lbs ground beef
1 large onion, chopped
1 TBL chopped garlic
1 15-oz-ish can tomato sauce
1 can Rotel (or store brand equivalent)
2 Tbl Chili Powder
1 Tbl Ground Cumin
salt and pepper to taste
a splash or three of Tabasco sauce (opt.)

3 cans cut green beans, drained

2 cups shredded Colby Jack cheese (more if you like)

Enough Mashed Potatoes to serve 8 people.  (I just eyeball everything)  Instant potatoes are fine.

In a large skillet, brown the ground beef. Drain off excess fat.  Add the onion and garlic, cooking till tender.  Add tomato sauce, Rotel and spices.
Simmer until thickened, about 30 minutes.

Pour Taco meat into the 13x9 inch baking pan.  Layer the drained green beans on top, evenly distribute the cheese and top with the mashed potatoes, spread them evenly. 

Bake at 400 degrees for about 30 minutes.  Remove and let sit for about 5 minutes before serving. 

Flambo!

Thursday, June 17, 2010

Pepperoni Potatoes

 I found this recipe in a Taste of Home magazine a few years ago and my family just loved this, often making it for breakfast. If you like texture, this will be quite satisfying with the red bell peppers and corn niblets.

I think I am going to try using Olive oil instead of the butter next time, and I will always use more seasonings!  Flambo!!

pepperoni potatoes 001

Pepperoni Potatoes

3 tbl. Butter
2 tbl. Flour
2 cups milk
1 tsp salt
½ tsp dried thyme (I prefer more)
¼ tsp dried basil (I prefer more)
1/8 tsp. pepper
1 28-32 oz. bag frozen hash brown potatoes, thawed (cubed)
¼ c. chopped sweet red pepper
1 can corn, drained
Mozzarella cheese, shredded, to taste
27 slices pepperoni, quartturkey pepperoniered (more or less. we of course use this:


In a small saucepan, melt the butter over medium heat. Stir in flour until smooth. Gradually stir in milk. Bring to a boil; cook and stir for 2 minutes or until thickened. Remove from heat. Stir in the seasonings.

In a greased 13x9x2 inch baking dish, layer the potatoes, red pepper and corn. Top with the white sauce, mozzarella cheese to taste and pepperoni. Bake, uncovered at 375° for 25 to 30 minutes or until heated through.

Wednesday, June 16, 2010

Link for Un-Soda

My sister, Spike, has a new blog, ”Divine She Cooks.“  I am passing along the link for her post on making Un-Soda that looks like something I want to try.

Un-Soda 

Be sure to use your favorite glass.  It doesn’t have to be pink.

glass

Flambo!!

Tuesday, June 15, 2010

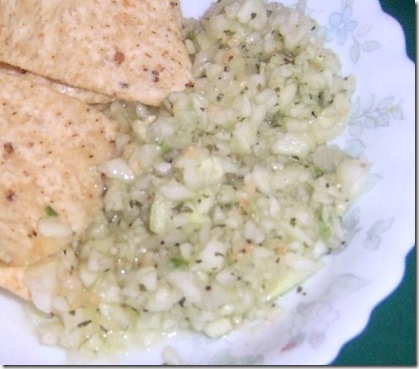
Cucumber Salsa

Too busy eating to say anything.  Make this and you’ll understand why..Flambo!!


cucumber salsa 001

Cucumber Salsa

3 large cucumbers, peeled, seeded and chopped
1 medium-sized SWEET onion a.k.a Vidalia, chopped
1/2 Jalapeno pepper, finely chopped (if you want lots of heat, add the whole pepper)
1 ~heaping~ TBL chopped garlic
Zest of fresh lime,careful to only lightly zest the green--the white is bitter (optional)

Juice of 1 fresh lime
1 TBL cilantro, or less if desired (I use dried in a jar)
Sea Salt to taste
Freshly ground pepper to taste


Combine all ingredients in your favorite pink serving bowl and serve with tortilla chips or as a topping in sandwiches or as a topping in fajitas or on a salad…or…Flambo!

Friday, June 11, 2010

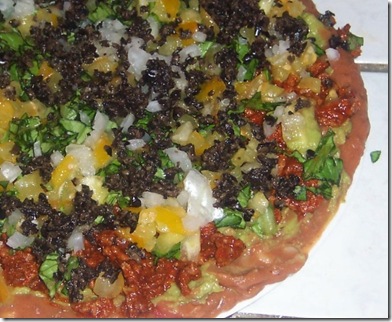
Milk-free 7-Layer Dip

 I was shopping with my mother (having taken my re-usable shopping bag with me—the pink one, of course) and decided I needed to make my children cry by making 7-layer dip. I was not successful at drawing tears.

We have milk allergies in our household so we have to do without sour cream, cheese and don’t get me started about store bought mixes.  Okay, I’ll start~Taco seasoning packets give me a headache. We substitute taco meat for the taco mixed sour cream layer. Sometimes I add a layer of salsa, but I forgot today. So, here is our version of 7-Layer Dip. Flambo!

7-layer dip 001

Oh, yeah…look at that.  Can’t even see the plate….

7-Layer Dip

1/2 pound ground beef
1/4 cup chopped onion
4-oz can tomato sauce
1 tsp chili powder
1/2 tsp garlic powder
1/2 tsp ground cumin
splash of tabasco
salt and freshly ground pepper to taste

1 15-oz-ish can refried beans
1/3 cup salsa
1 tsp chili powder
1/2 tsp garlic powder
salt and freshly ground pepper to taste

1 cup Guacamole

Chopped lettuce, desired amount

1 tomato, chopped, color of choice

1/4 cup chopped onion

Black olives, sliced or chopped
(we used chopped today)

In a small skillet (I use cast iron) brown your ground beef. Add onion and cook until onion is tender. Add tomato sauce and seasonings.  Simmer until taco meat blend is cooked through and not runny. (I can’t think of the right word today….Flambo!)

Meanwhile, in another pot, pour your refried beans, salsa, and seasonings. Mix well and heat.

Now we can start building our 7-Layers.

  1. On a favorite large plate, preferably pink, spread the Refried Bean mixture. 
  2. Next layer,using your favorite pink spatula, spread the Guacamole on the bean layer
  3. Next layer, sprinkle the taco meat on the Guacamole layer.
  4. Next layer, sprinkle the chopped lettuce
  5. Next layer, sprinkle the tomatoes, (we used yellow today)
  6. Next layer, sprinkle the chopped onion.
  7. Next layer, black olives

Serve with Tortilla chips, or Pita chips, or bread, or vegetables….Just make sure you enjoy the flavors.

You can add more layers of anything as you desire, of course, you just can’t call it 7-layer dip anymore.  Flambo!


Wednesday, June 2, 2010

Chocolate Cake?! I Think NOT

So my Chocolate Cake was more like….a crumbly, Chocolate flavored Plaster of Paris.  It probably would have been better suited to make a sculpture of Louis Armstrong blowing on his trumpet instead of trying to eat it. Satchmo!!! 

Louis Armstrong

Here is what makes great Chocolate Plaster of Paris:

3/4 cup butter flavored crisco
3 eggs
2 cups all-purpose flour
3/4 cup cocoa powder
1 tsp baking soda
3/4 tsp baking powder
1/2 tsp salt
1 tsp Cinnamon
1/2 tsp ground Allspice
2 cups sugar
2 tsp vanilla
1 1/2 cups Almond milk

My thanks to Better Homes and Gardens cook book for this recipe.  I shall remember where to turn when I want to sculpt the Jazz greats.  Maybe we’ll do this for a homeschool unit. Hmmm….

We shall try again. FLAMBO!!

Monday, May 31, 2010

Bean Pot

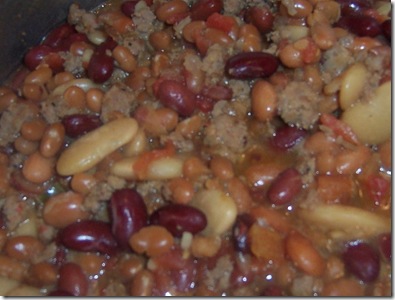
This is a staple in our household. We’ll make this when we can’t think of anything else to do. The kids really like it and some serve it up with French Fried Onions on top

beanpot 001

Bean Pot

1 LB ground meat (your preference We like to use Maple sausage)
1 medium onion, chopped
1 can Rotel, or equivalent store brand
1– 20 oz can Baked beans , (we use Bush’s Vegetarian)
1– 15.5 oz can Kidney beans, not drained
1- 15.5 oz can Pinto beans, drained and rinsed
1-15.5oz can Red beans, drained and rinsed
1-15.5 oz can Butter beans, drained and rinsed
2 TBS. spicy brown mustard
2 TBS. Barbecue sauce
2 TBS brown sugar

In a skillet, brown ground meat and onion till cooked through, and onion is tender.

Add all ingredients to a large pot, being mindful of which beans to drain and which do not get drained. Simmer for about 1-½ hours, stirring occasionally.

Can be cooked in a crock-pot.

Sunday, May 30, 2010

Looking for Chocolate Cake

mad science

I am looking for a really good chocolate cake recipe. My former steply-ug-mother made a fabulous chocolate cake she called Mississippi Mud. Thus far in my search I can only find it with marshmallows and that was not what she made. It had like....Allspice and Cinnamon in it also, I think. searching...searching....maybe get my Flambo on, shout~No Fear! ~ and just experiment!!  Flambo!!

Wednesday, May 19, 2010

My Insatiable Son Bakes Muffins

My Insatiable son enjoys cooking and has become known for his muffins in our small circle of friends. His favorites are Blueberry, Peach Vanilla Jam and Chocolate Chocolate Chip. 

“For some, cooking is an art form. Patrick takes that literally”~Dana
You will see why.

001

Peach Vanilla Jam Muffins

2 eggs
1/2 cup canola oil or extra light Olive Oil
1 cup milk
1 tsp Vanilla Butter and Nut flavoring (straight vanilla will do…)
1/2 cup of mom’s home made Peach Vanilla Jam (ordinary Peach jam will do)

3 cups muffin mix (see side bar)
1/2 tsp cinnamon
1/4 tsp nutmeg

Preheat oven to 400 degrees.  Grease 12- cup muffins pans.

In a large mixing bowl, combine oil, eggs and Vanilla Butter and Nut flavoring to look like an owl’s face.

owl eggs 003

Turn bowl around, add milk and cinnamon to create a smiley face.

owl eggs 006

Mix well. Add Peach Vanilla Jam (or a jam or your choice), add nutmeg and, mix well.

Add Muffin mix, until combined, and scoop into muffin cups.  Bake at 400 degrees for about 16-18 minutes, or until muffins and golden brown.

Cool for about 5 minutes and turn out onto cooling rack.  Enjoy.

Saturday, May 8, 2010

So the oven was smoking the other day …

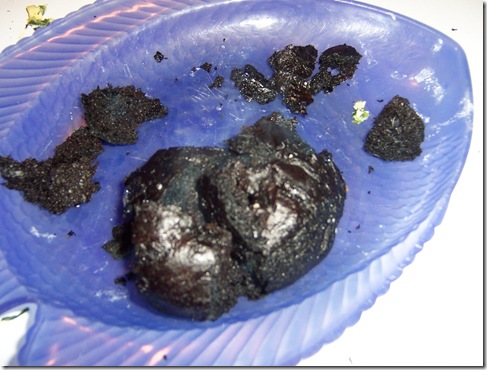
My Insatiable son was sweeping in the kitchen the other day and noticed the oven was smoking. We were baking something other than bagels, for a change and I couldn't imagine why something was burning <scratching head> .  We opened the door, turned on a flashlight and discovered a burnt through and through Sundried Tomato Bagel!!! <Gasp!>  It must have fallen off the baking stone, unnoticed.

braw;eu and pead salad 003

Pea Salad

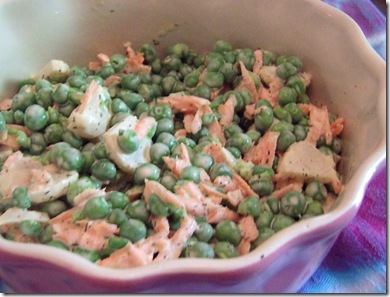
During my husband’s illness with Oligodendroglioma (which is a type of brain tumor that takes prisoners, but leaves no survivors--as of 5 years ago), I became a regular in the cafeteria at UAMS in Little Rock.  The salad bar offered this wonderful Pea Salad on a regular basis.  My mom and I loved it, so I tried to figure out what was in it and this is what I came up with. 

pea salad 002

Pea Salad

1 16-0z bag frozen Petite peas, thawed (do not cook)
1/2 cup grated carrot
1/2 cup canned sliced water chestnuts, sliced in half forming half circles
1/3 cup Kraft Mayonnaise (more or less, to your taste)
1 tsp dill weed (more or less, to your taste)
salt and pepper to taste

In a medium sized pink mixing bowl, combine all ingredients, and, using your favorite pink spatula, mix well.  Chill for an hour or so for flavors to combine.